· The manual
How SceneWeaver works.
The whole studio, explained start to finish. Read it through once, or jump to the step you're stuck on.
What SceneWeaver is
Watch · 3 lessons
SceneWeaver writes, casts, designs, shoots, and publishes short vertical dramas — the 9:16, phone-first episodes you see on ReelShort or TikTok. You bring a story (or borrow one of ours); the studio turns it into a screenplay, a cast of consistent characters, designed locations, generated footage, and a finished episode people can watch.
Everything follows one production line, shown as numbered steps across the top of every project: Script → Breakdown → Cast → Design → Motion → Shots → Publish. You can walk it start to finish, or jump straight to the step you care about — steps marked OPT are optional and safe to skip.
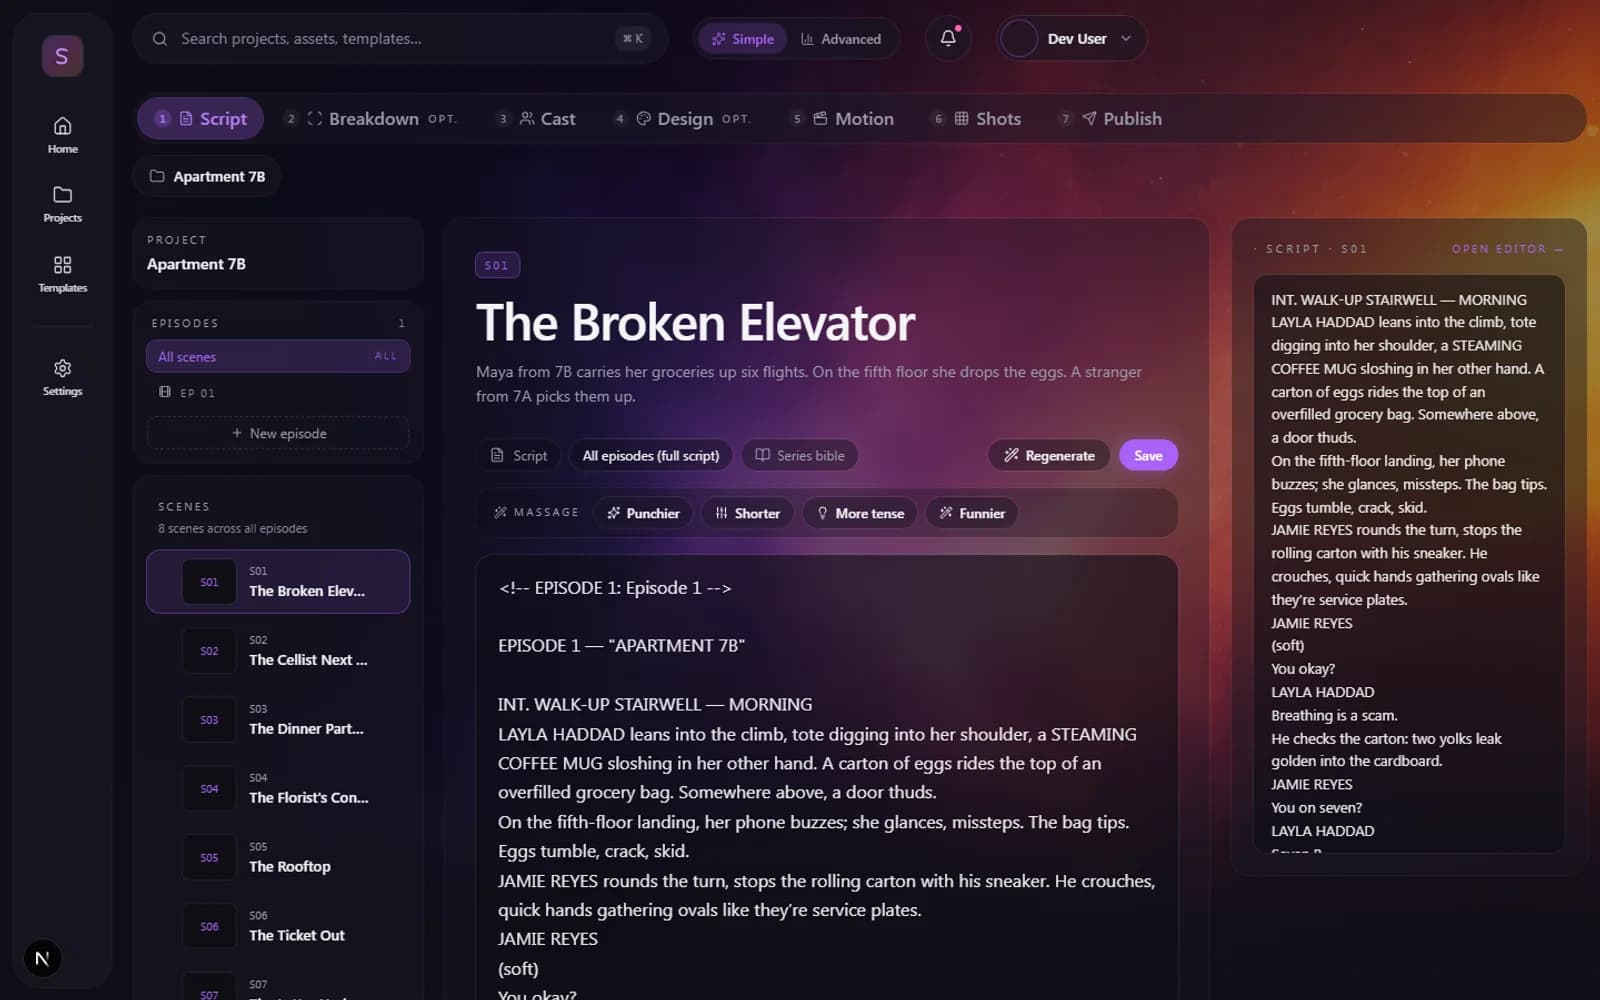
Two ideas hold the whole studio together. First, the library: every character, location, prop, and visual style is a reusable asset with locked-in reference art, so the same face and the same wardrobe show up in every shot. Second, credits: generation costs credits (images, video clips, narration, renders), and every screen that spends them shows you the price before you commit.
Your first show
Watch · 4 lessons
Hit New project and you get two cards. From template forks a complete, ready-to-shoot show — a real screenplay, a fully assigned cast, matching locations, a preselected visual look, and pre-rendered stills for every shot. Start from scratch takes a premise instead — one or two sentences — then asks for a tone and a length and writes an original screenplay for you.
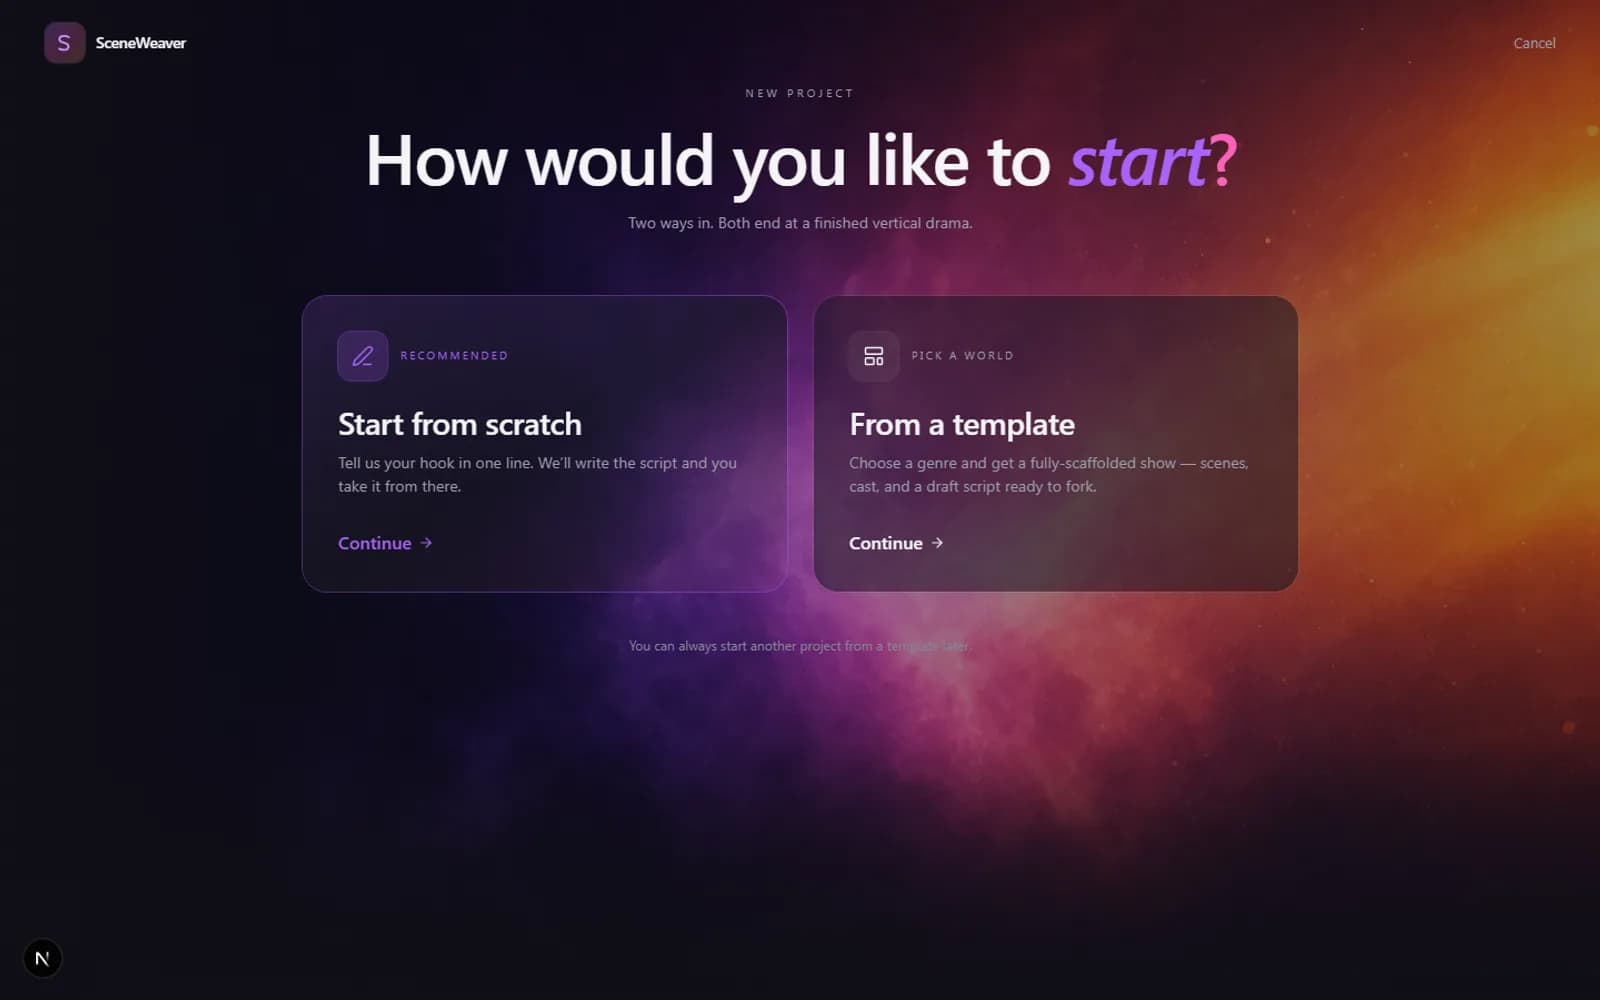
The template path
Browse the Templates page and open anything that looks fun — each template page shows the premise, the cast, sample films made from it, and an honest cost estimate: what a stills-first episode costs, and what upgrading every clip to full motion would add. Use template drops you into the wizard with the story and look already chosen; review and hit create.
A template project opens finished on the inside: every speaking part is already cast with a library character, the visual style is set, and the Shots grid opens with every frame already rendered. From there you can publish as-is, re-roll any frame you dislike, or animate shots into true video clips.
TipTemplates default to stills — animating clips is the expensive part, so the estimate leads with the stills cut and shows motion as an optional upgrade.
The scratch path
Type a premise ("A wedding planner keeps planning weddings for people she's secretly in love with"), pick a tone, pick a length — Short (~60s), Standard (~3 min), or Full episode (~7 min) — and SceneWeaver writes the screenplay and scaffolds your first episode from it: scenes, shots, and suggested cast slots, all derived from what it wrote.
Simple vs Advanced
The toggle in the top bar switches the whole app between Simple and Advanced. Simple hides the optional machinery (Breakdown, Design, the timeline editor) and keeps you on the happy path; Advanced shows every step and every knob. Start Simple; nothing is lost when you switch later.
Script
Watch · 2 lessons
The Script step holds the screenplay, split into scenes down the left. Edit freely — scene headings, action lines, dialogue. Character cue lines (the UPPERCASE names above dialogue) matter more than they look: the Cast step builds its role list from them, scene by scene.
Shows are episodic. The series bible — world rules, character sheets, running threads — lives behind the bible drawer and is what keeps episode 2 consistent with episode 1: when you ask for a new episode, SceneWeaver writes it against the bible plus a recap of what already happened, so continuity carries and nobody gets accidentally re-cast.
TipRenaming a character? Rename their cue lines consistently and the Cast step follows. The bible can keep the lore name ("Lady Aeris") while the script uses the cue ("AERIS").
Cast
Watch · 2 lessons
The Cast step reads your script and lists every speaking part per scene. Each slot takes a character from the library — yours or the house catalogue. Template projects arrive with every slot filled; scratch projects offer Auto-fill, which matches roles to suitable characters in one pass.
Why this matters: each library character carries a cinematic portrait plus a multi-view character sheet (front, back, profile, full body). Those references ride along into every image and video generation, which is what keeps a face, a body, and a wardrobe consistent from shot to shot — the hard problem of AI filmmaking, handled by the library.
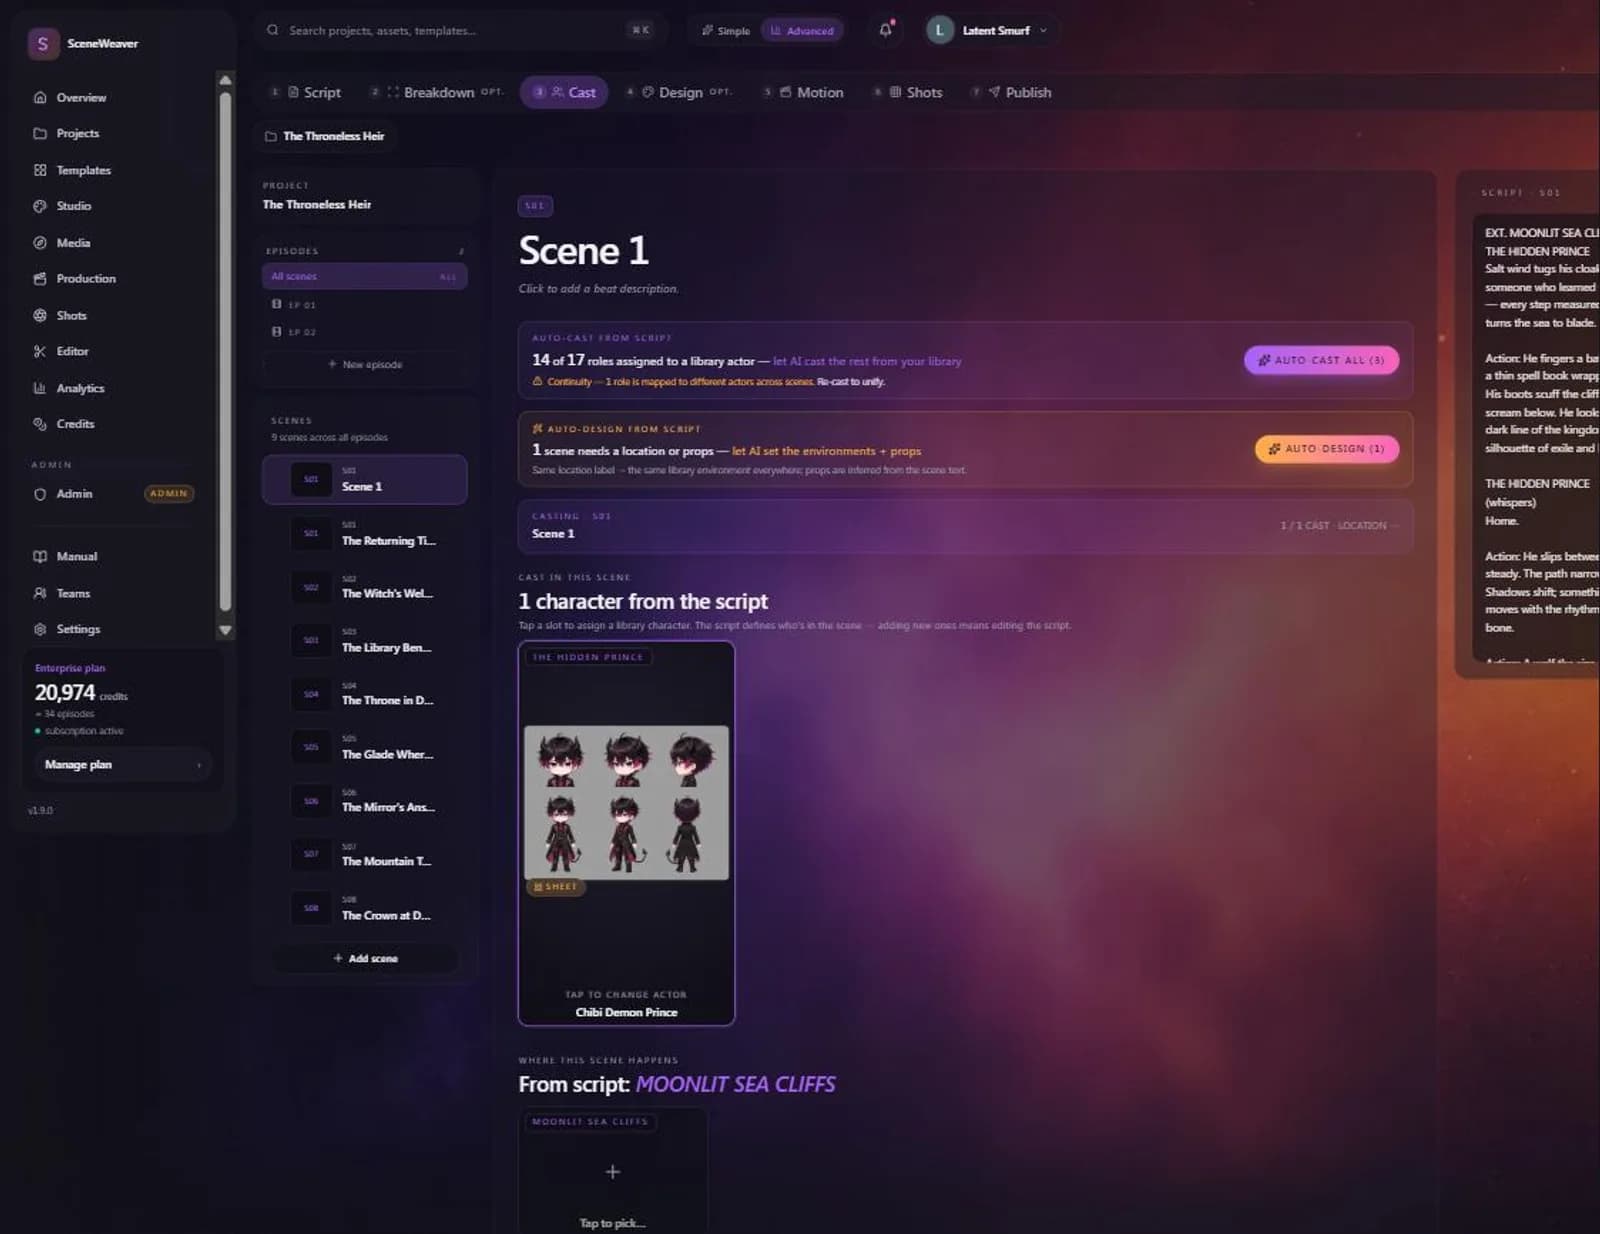
Need someone new? Create a character in the library with a description and SceneWeaver generates their portrait and sheet. Don't like a face the catalogue gave you? Recast regenerates a character's identity art from scratch.
Design (optional)
Watch · 2 lessons
Design is where the show's look lives. The style picker (also available project-wide on the Shots step) applies one of 100+ visual looks — cinematic grades, anime, claymation, noir — to every new generation. Template projects come with a look preselected; change it any time and regenerate.
Locations work like cast: each one is a library asset with identity plates — a reverse angle, an approach, and a detail shot — so the same courtyard reads as the same courtyard from any camera position. Props attach to scenes and get named in generation prompts.
TipStructural styles (anime, stop-motion, comic) re-draw the whole frame in that medium. If a look comes back "live-action with a filter," re-generate — the engine treats the style reference as the medium, and a re-roll usually lands it.
Motion
Watch · 3 lessons
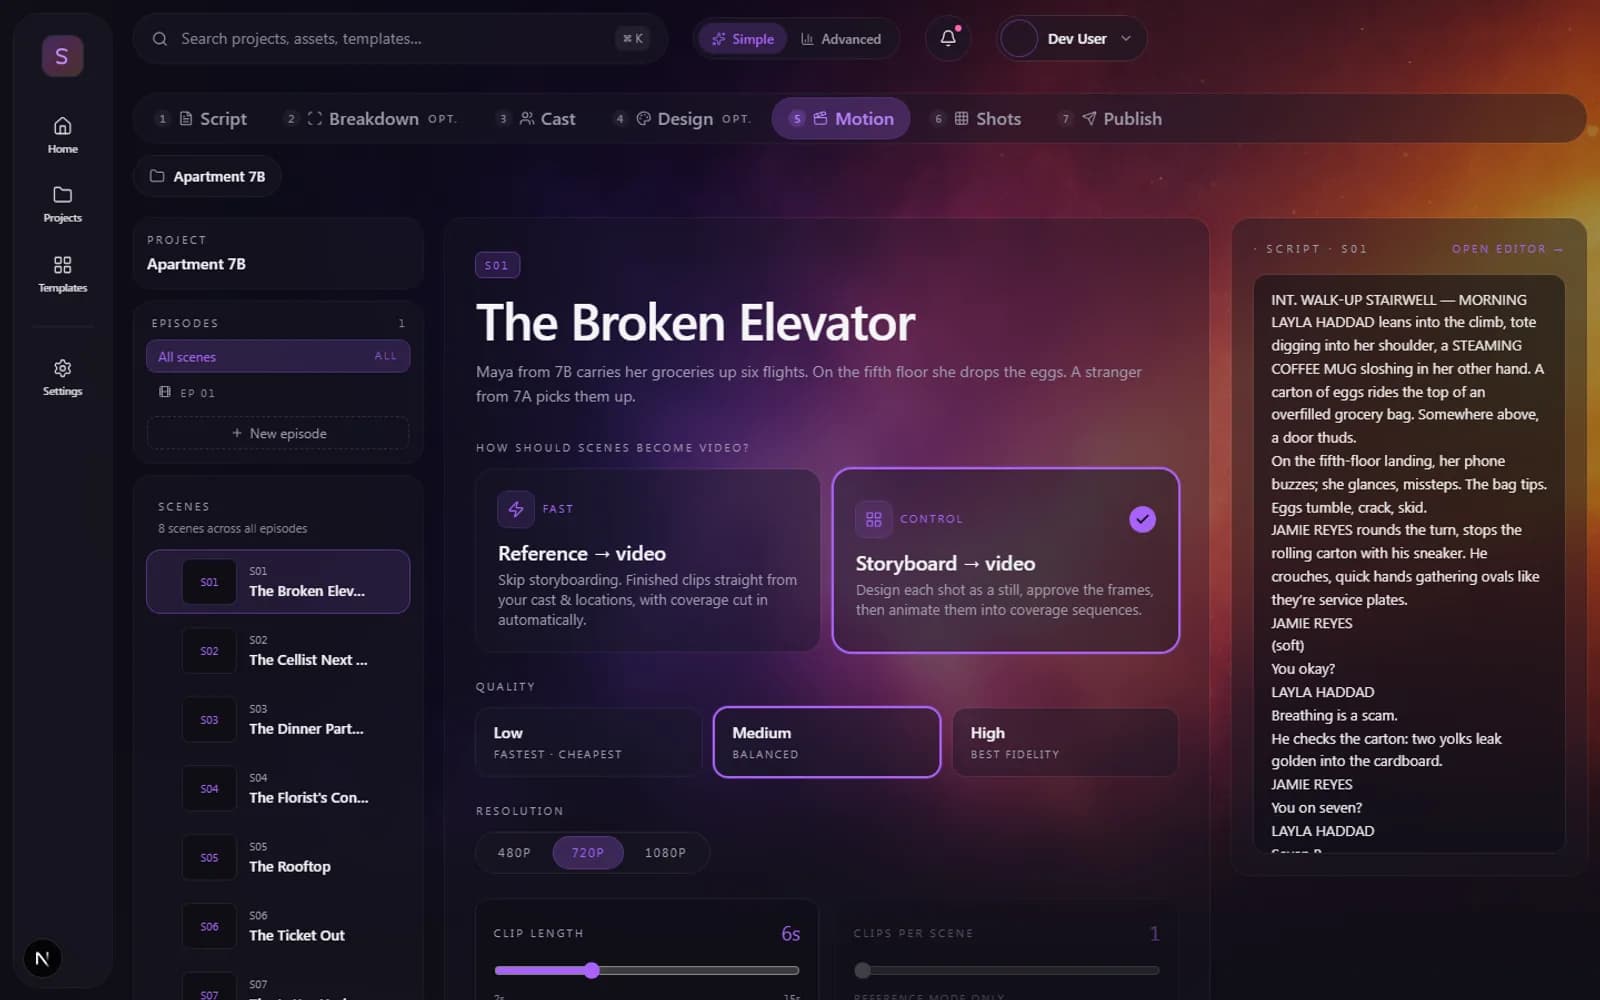
Motion decides how footage gets made. Reference → video (Fast) skips storyboarding: finished clips are generated straight from your cast and location references, with coverage cut in automatically. Storyboard → video (Control) goes frame-first: you generate and approve each shot as a still, then animate the approved frames — more control, more steps.
Below the mode cards: quality (Low / Medium / High), resolution (480p / 720p / 1080p — 1080p is a Studio feature), clip length, and clips per scene. The cost bar updates live as you change any of them, in credits, before anything is submitted.
Continuity and audio
One continuous scene chains clips so each one picks up from the last clip's final frame — same face, wardrobe, light, and grade carried straight through the cut. Separate takes generates each clip independently from the reference art: faster and cheaper, but shots won't match each other as tightly.
Generate audio produces native synced sound on each clip in reference mode — dialogue lands on the first clip of a scene so chained continuation clips don't repeat lines.
TipChained clips render sequentially (each waits for the previous one), so a long chained scene takes real wall-clock time. The UI is honest about this — expect minutes, not seconds.
The video engines
Watch · 2 lessons
All video in SceneWeaver is generated by Seedance 2.5, a state-of-the-art video model we run through a platform partner. We re-evaluate the field regularly against every major engine — what keeps Seedance in the seat is reference capacity: it accepts up to fifty reference images per clip, and SceneWeaver uses that budget hard. Every clip is conditioned on your cast's character sheets and portraits and your locations' identity plates, which is why the same face, wardrobe, and set survive from shot to shot. Competing engines cap out at three to seven references — not enough to hold a cast together.
References cost you nothing. Video is billed by the second of output, not by how much reference material conditions it — so a clip with your full cast and every location plate attached costs exactly the same as a bare one. Never economize on references.
Quality tiers, honestly
Low, Medium, and High are the same engine at different resolutions: 480p, 720p, and 1080p. Nothing else changes — same model, same references, same audio. Cost scales with resolution (Low is half of Medium; High is two and a half times Medium) and linearly with clip length, which is why the estimate moves as you drag the length slider. 1080p is a Studio-plan feature.
TipShooting drafts? Generate at Low, pick your takes, then re-generate the keepers at your delivery resolution. The references keep identity consistent across resolutions.
Audio, length, and chains
Clips come with native synced audio — dialogue, ambience, and effects generated with the picture, at no extra cost. Clips run 2 to 15 seconds; scenes that need more are covered by multiple clips, and with One continuous scene enabled each clip continues from the previous clip's final frame, so a long scene plays as one take. Chained links cost roughly 1.5x a normal clip (the engine is billed for the clip it continues as well as its own output) and render one after another — the estimate and the ETA both account for this before you commit.
Shots
Watch · 2 lessons
Shots is the working wall: one card per shot, grouped by scene, with status lanes (Pending → Queued → In Progress → Rendered → Reviewed). Generate all fills every pending frame in one batch; Generate now on a card does just that one; opening a card gives you the Shot Canvas with the full prompt, references, and version history.
Each generation is automatically conditioned on the scene's cast sheets, the location's plates, and the project style — you don't wire references by hand. Re-rolls keep a version history, so a re-generate never destroys the frame you had.
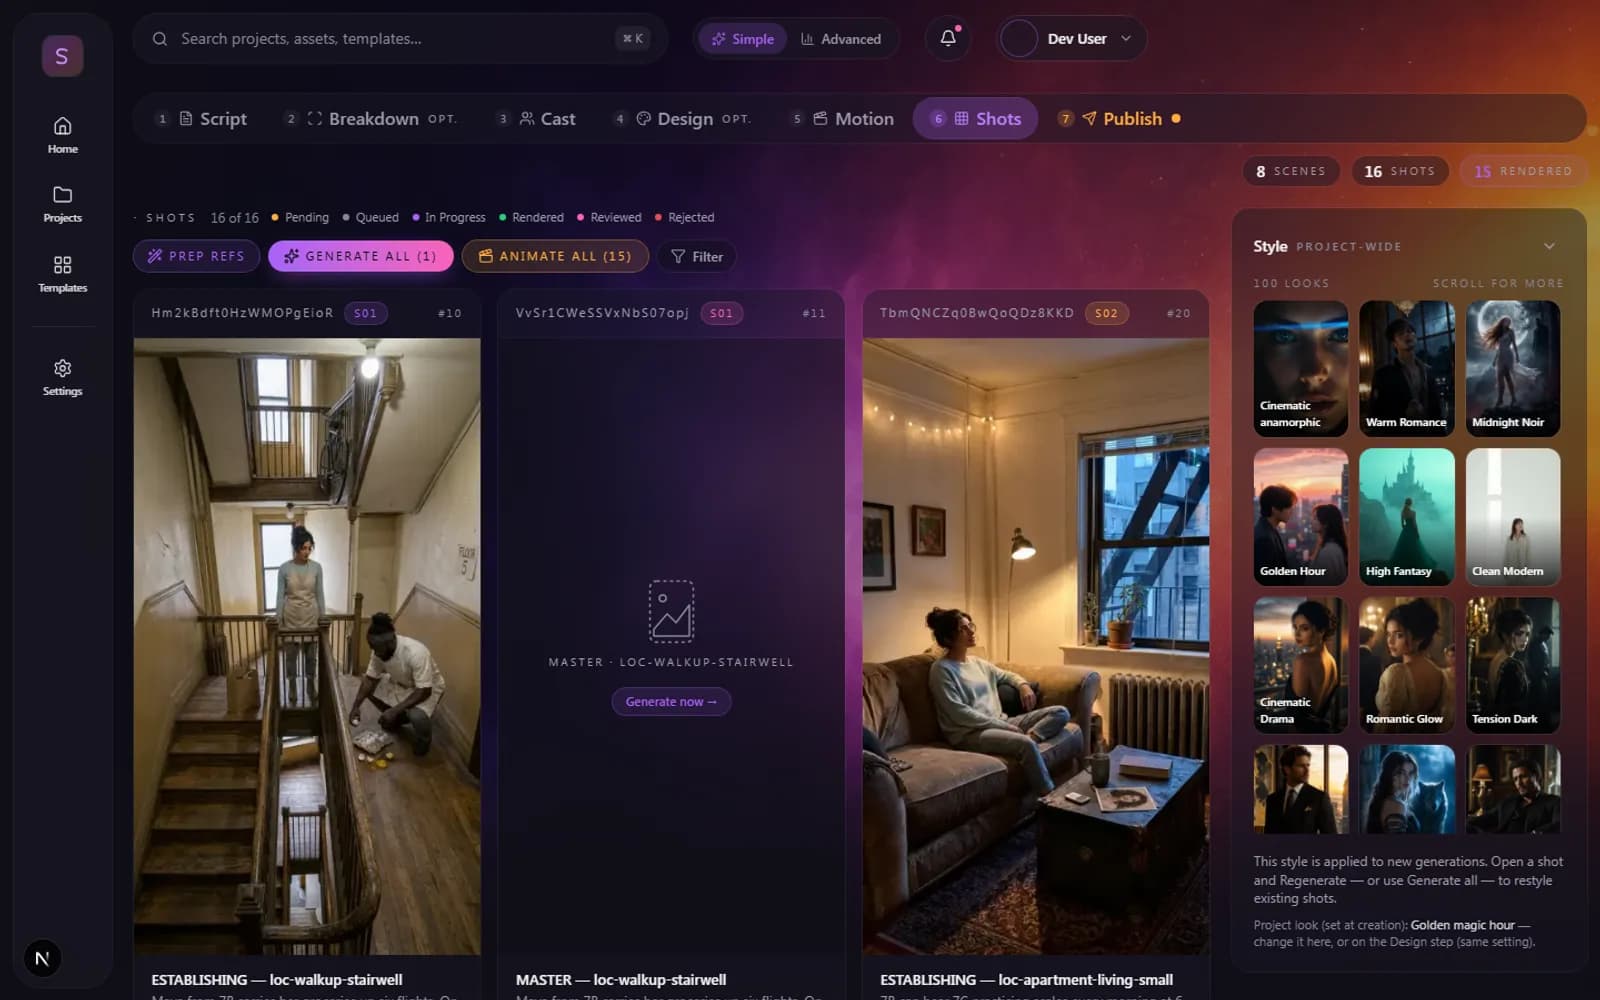
Animate turns an approved still into a video clip (this is the per-shot version of what Motion does in bulk). Template projects open with this grid already full — every frame pre-rendered — so your first act here is reviewing, not generating.
Publish
Watch · one lesson
Publish assembles the episode — every clip at its real runtime, stills at their planned duration, narration and captions timed to the actual cut — renders it, and puts it on your channel. Visibility is yours: public lands it on the /watch feed, unlisted gives you a shareable link only.
Published episodes get closed captions from the script automatically, and viewers can follow your channel to get notified in-app when the next episode lands. The share kit packages downloads with SRT subtitles, and a connected YouTube account can publish directly.
The timeline editor
Watch · 2 lessons
The Editor (in the left sidebar, Advanced mode) opens your episode as a real timeline: video clips and stills on visual tracks, narration on audio tracks, text overlays above. It seeds itself from your shots the first time, then autosaves your cut as you work — locally every few seconds, to the server shortly after.
It stays in sync with production: if you re-shoot or animate a shot after saving a cut, the editor reconciles on open — updated clips swap in place (your timing untouched), brand-new shots append at the end, and a toast tells you what changed. Re-seed in the header rebuilds the whole timeline from the current shots if you'd rather start the cut over.
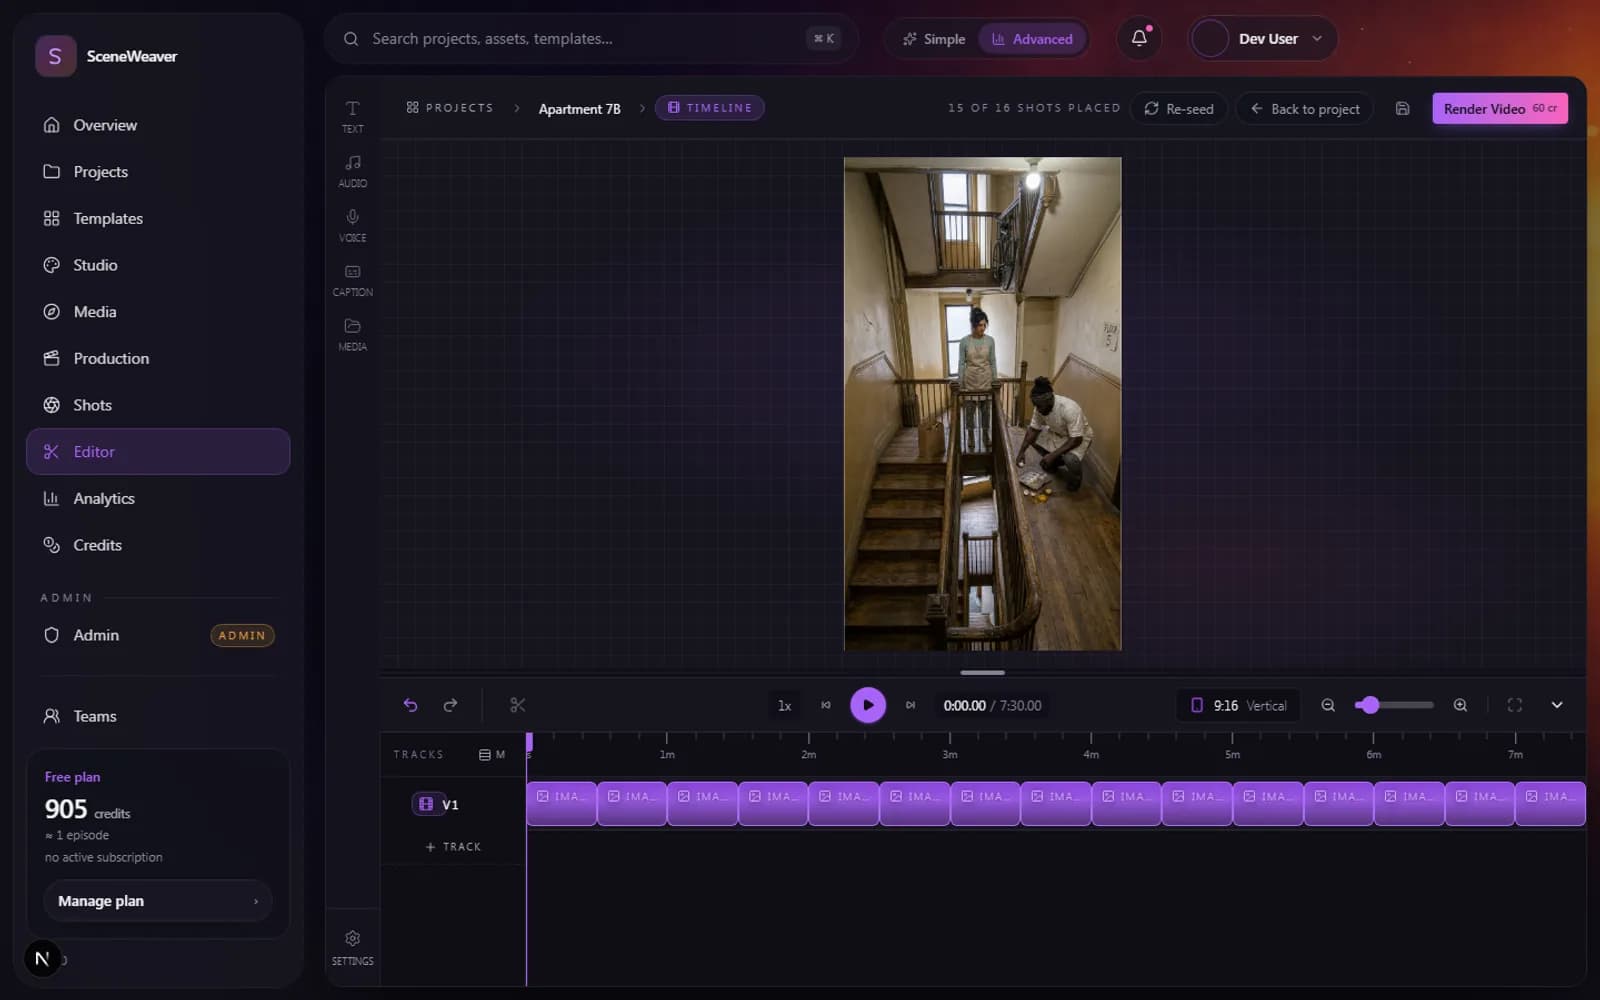
Right-click any AI clip or still on the timeline to regenerate it without leaving the editor — same prompt and references as the original generation. Tracks resize (S/M/L), new tracks appear when you drag below the last one, and the Media panel is your project library: uploads, generated assets, and audio, drag-and-drop onto the timeline.
TipThe editor never deletes your work on its own: reconcile only swaps media and appends — orphaned clips, custom text, and audio always survive.
Credits & plans
Watch · one lesson
Credits pay for generation: images, video clips (priced by length, quality, and resolution), narration, and renders. Your balance sits bottom-left; the Credits page itemizes every charge and grant. New accounts start with enough for about one stills-first episode; paid plans grant monthly credits, and the plan tier also gates features like 1080p export and shot animation.
Every surface that spends shows the price first: the template page estimates the whole episode, the Motion step prices the clip plan live, the shot canvas prices a single generation, and the render button quotes exactly what the server will charge.
Connect AI agents
Watch · one lesson
SceneWeaver has a full agent interface: 25 tools to search the library, read projects, write scripts, cast characters, generate stills, animate shots, and publish — the same operations the app performs, over the Model Context Protocol.
Set it up at Account → API keys: mint a key (read-only or read-write, with a daily credit cap), then follow the connect guide on that page — copy-paste configs for Claude Code, Cursor, and any MCP client. Keys are shown once, stored hashed, and revocable instantly.
When something goes wrong
Watch · one lesson
A generation failed: usually the provider declined the specific image — re-roll once; if one character fails repeatedly, try Recast (providers occasionally refuse a particular face). Your credits are refunded automatically when a generation errors out.
Motion is taking forever: video generation queues at the provider run minutes per clip, and chained scenes render sequentially by design. The clip cards show real progress; leaving the page is safe — clips finish server-side.
A look doesn't look right: structural styles occasionally come back photographic. Re-generate the shot; the style reference governs the medium and re-rolls almost always land.
Still stuck? The Docs page answers the operational questions (billing, refunds, data deletion, shortcuts); the Changelog shows what just changed; and support@sceneweaver.ai reaches a human. The Status page tells you if it's us, not you.